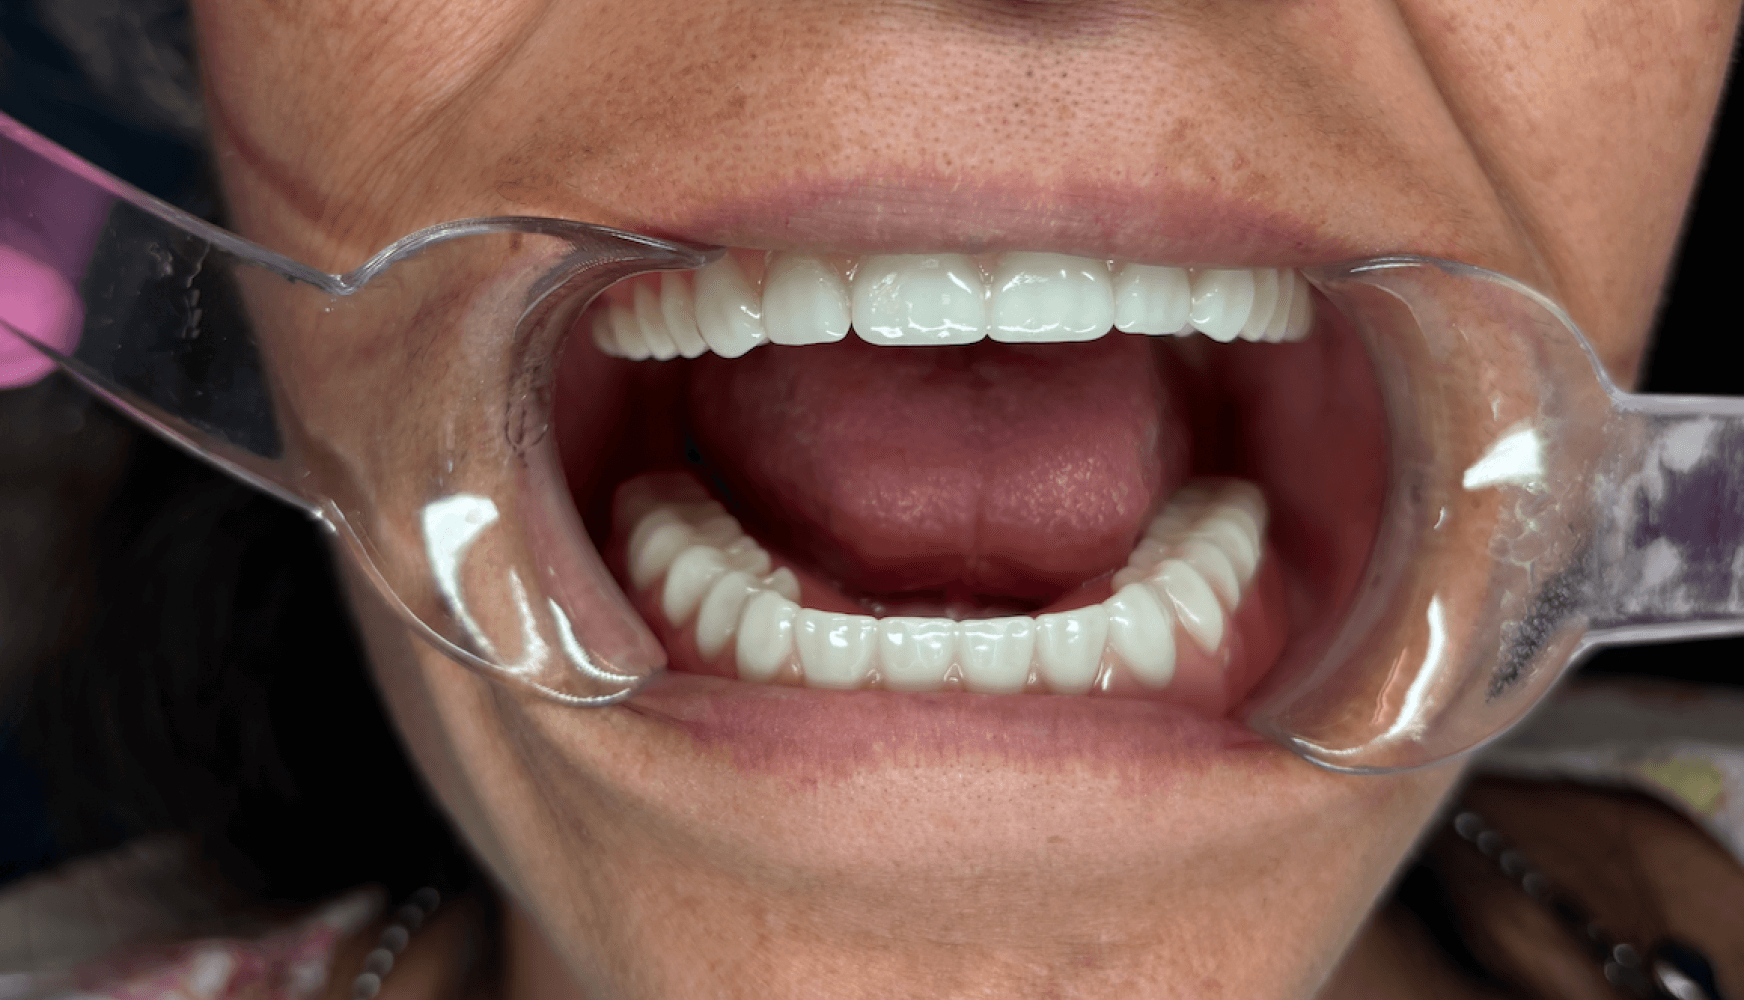
For edentulous patients, immediate dentures offer a temporary solution to restore function and aesthetics following extractions. However, as patients transition to long-term care, implant-supported dentures with locator attachments provide improved stability, comfort, and overall satisfaction. In the following case, I will outline the treatment steps taken for a patient who first received immediate dentures and later transitioned to implant-supported prosthetics. The case highlights key moments from both phases of treatment and demonstrates the use of digital tools for precise planning and successful outcomes.
Patient Presentation
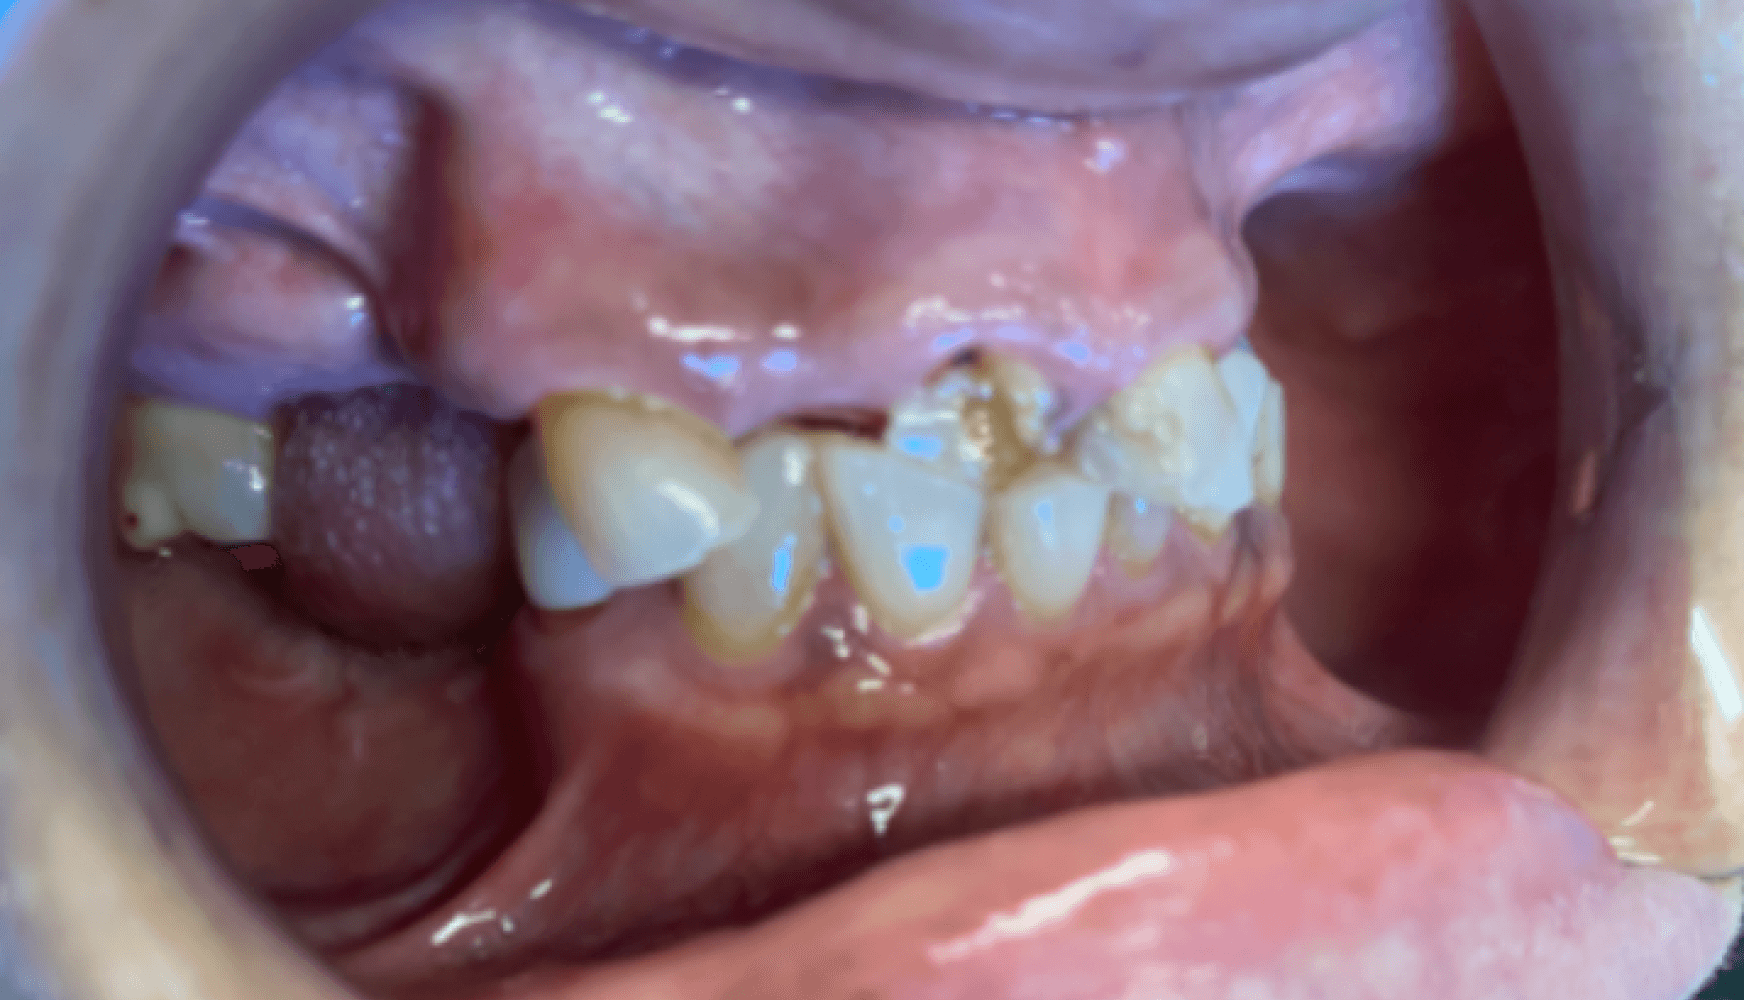
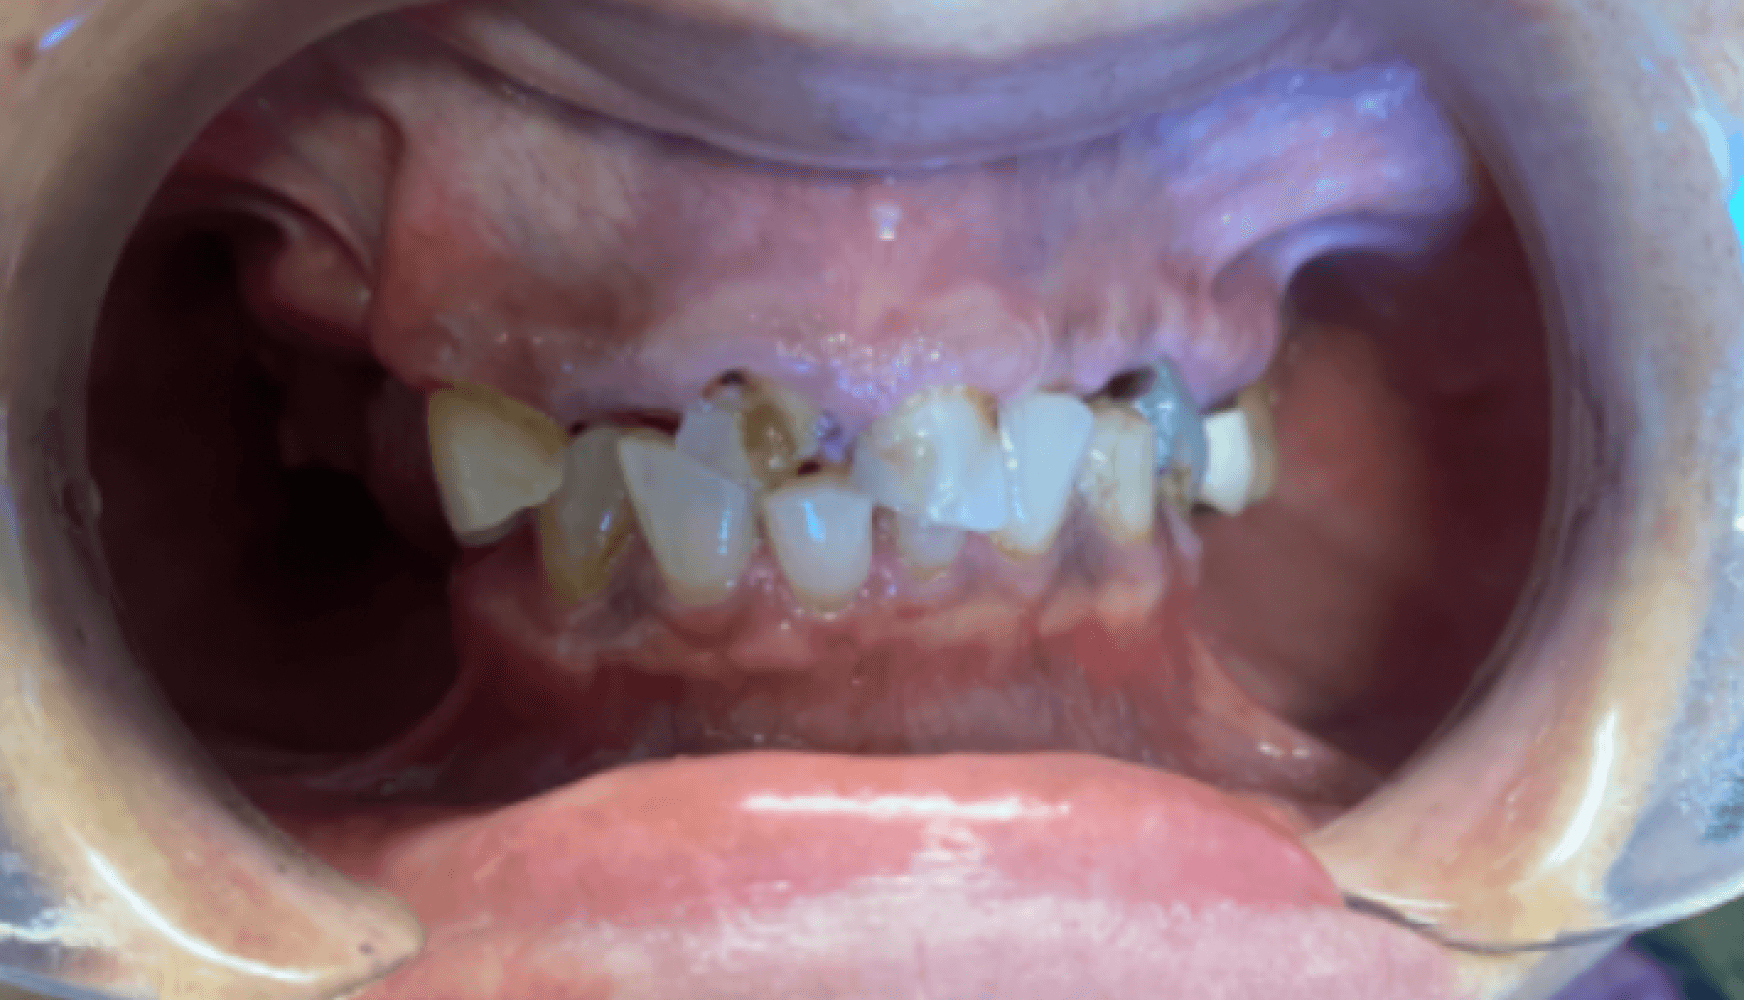
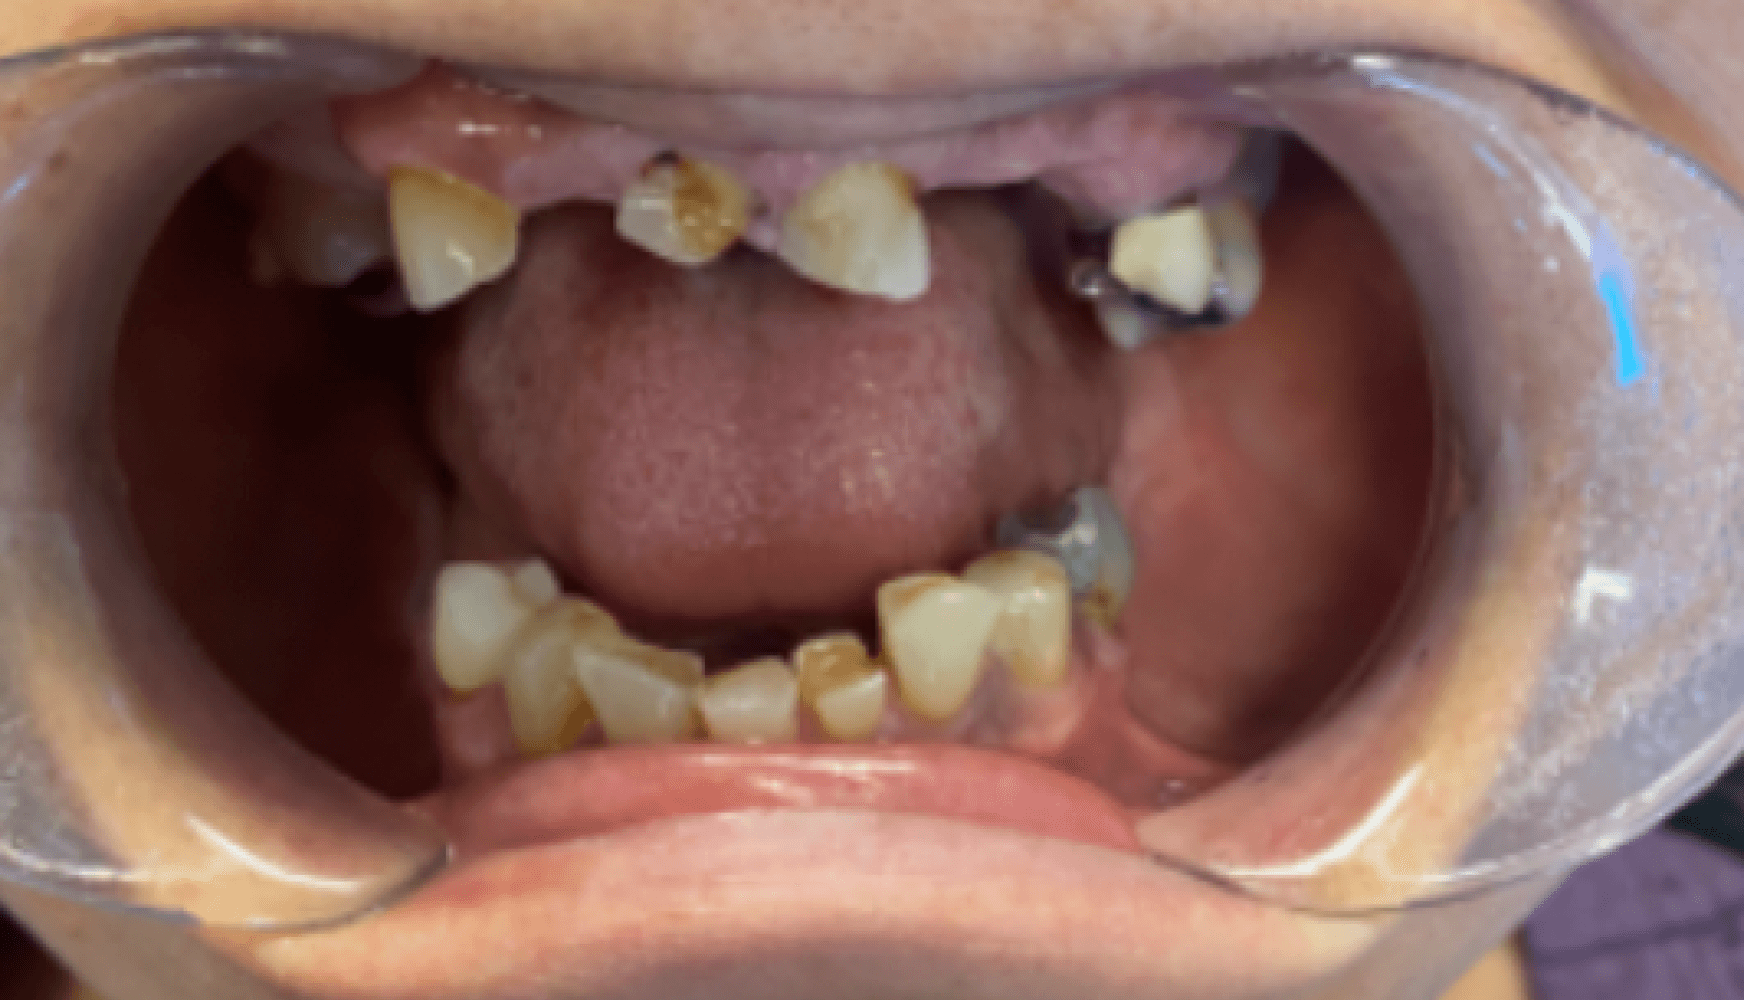
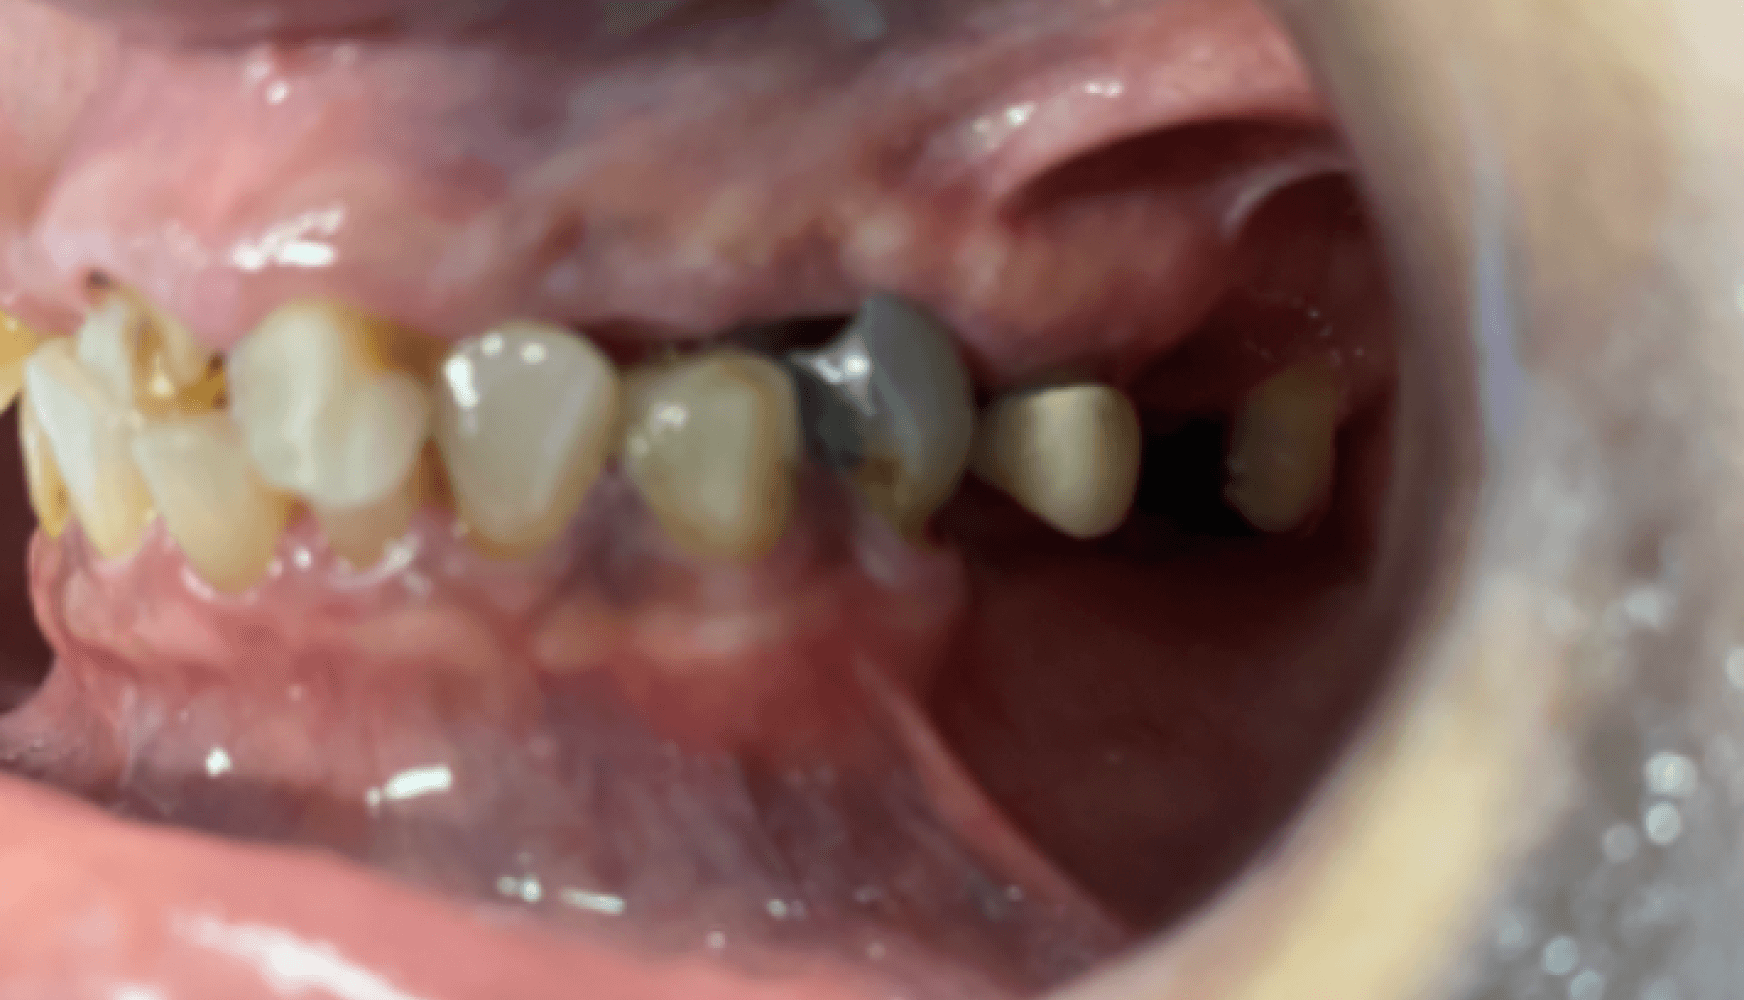
Fig. 1a, 1b, 1c, 1d: The patient’s dentition upon examination reveals significant reduction in VDO, a drastic left-to-right tilt in her smile line, and atrophy of the posterior mandibular ridge.
The patient presented with terminal dentition, multiple compromised and missing teeth, and a significant reduction in vertical dimension of occlusion (VDO) due to years of attrition and bruxism. The patient exhibited a drastic left-to-right tilt in her smile line, with significant atrophy of the posterior mandibular ridge. The right temporomandibular joint (TMJ) displayed a non-reducing disc and deviation to the right upon translation. These anatomical challenges, combined with the patient’s desire for improved function and aesthetics, necessitated a multi-phase treatment plan, beginning with immediate dentures and progressing to implant-supported dentures.
This case was multidisciplinary in nature: the patient was to have extractions, alveoloplasty, and implant placement by her periodontist, and I would be handling the prosthetic work.
Case Description
Appointment #1:
During the initial consultation, we reviewed the patient’s medical history and completed a thorough oral examination. The patient was found to have multiple broken and missing teeth, severe posterior ridge atrophy, and a collapsed bite due to years of tooth loss and bruxism. The patient’s VDO was significantly reduced, contributing to the functional challenges she experienced. We discussed the phases of her treatment plan, beginning with the fabrication of immediate dentures following extractions, and progressing to implant-supported dentures. Given the atrophy of the posterior mandibular ridge and the drastic smile line tilt, careful planning was required. The immediate dentures were scheduled for fabrication following her upcoming extraction and implant surgery.
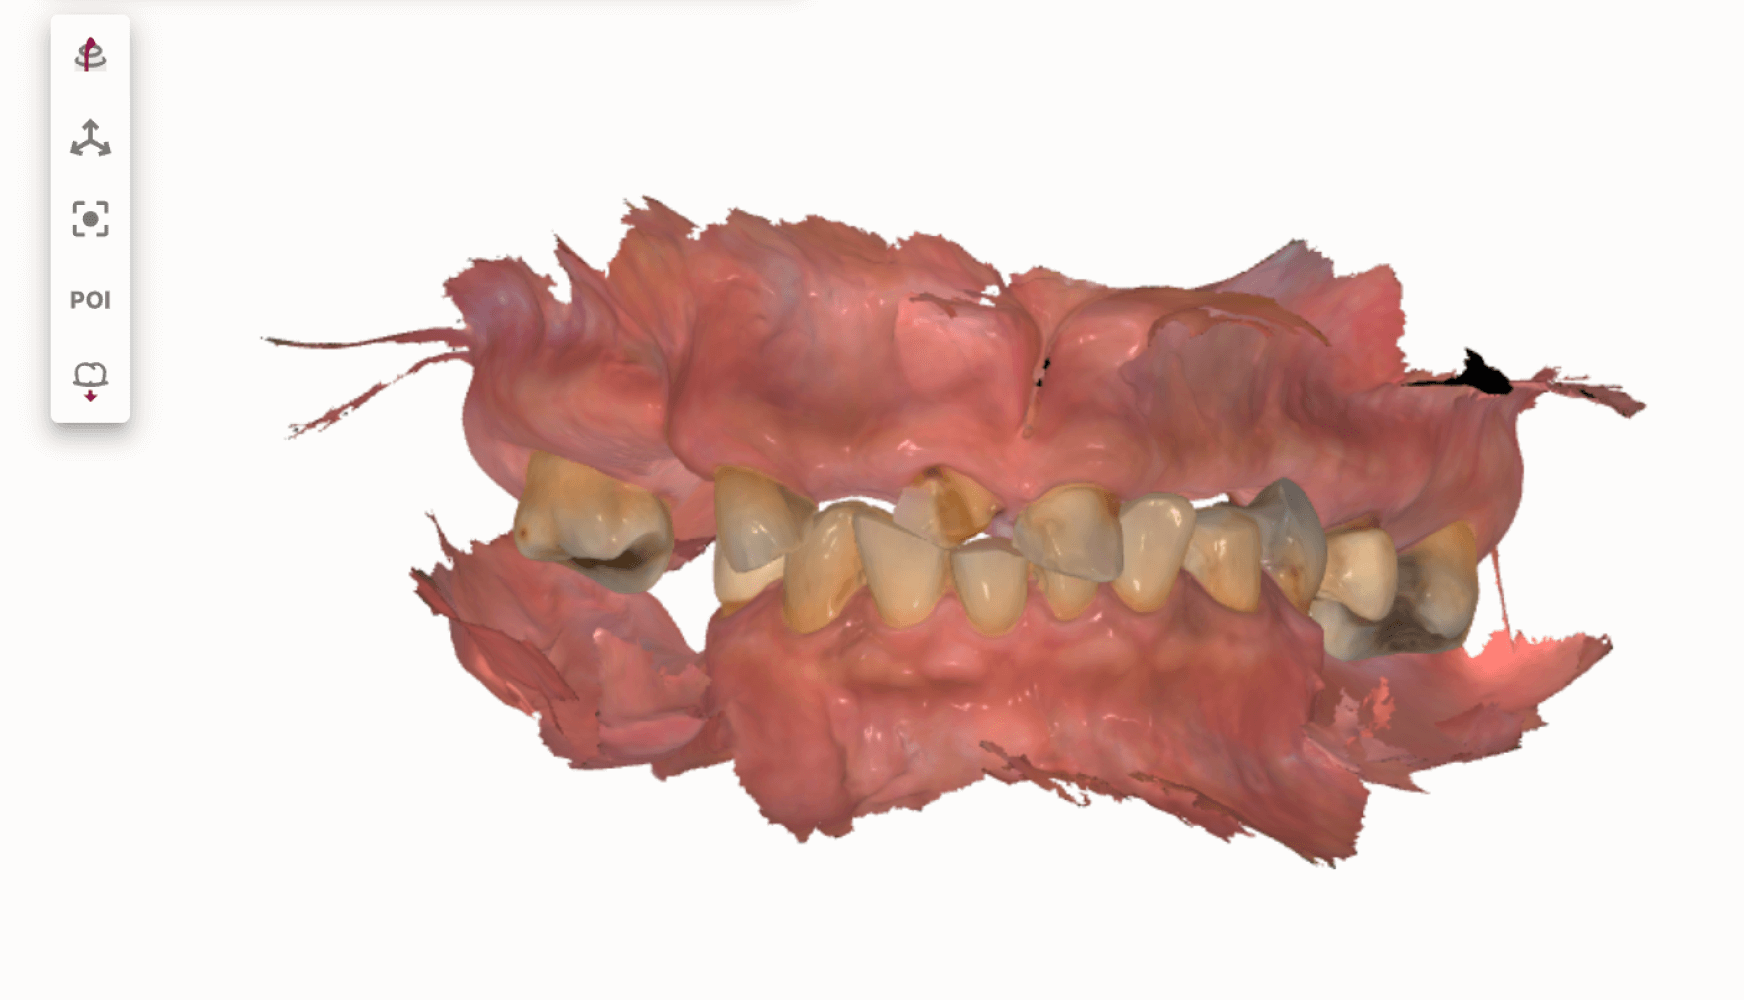
Fig. 2: The intraoral scans captured during the patient’s second appointment. These scans will be used as the blueprint for the upcoming immediate dentures.
Appointment #2:
At this appointment, the immediate denture process was reviewed with the patient, including necessary post-surgical adjustments. The patient’s daughter provided a photo of the patient’s smile from several years ago, which served as a reference for recreating the smile line. The patient would wear the immediate dentures for approximately four months while we worked towards implant-supported dentures.
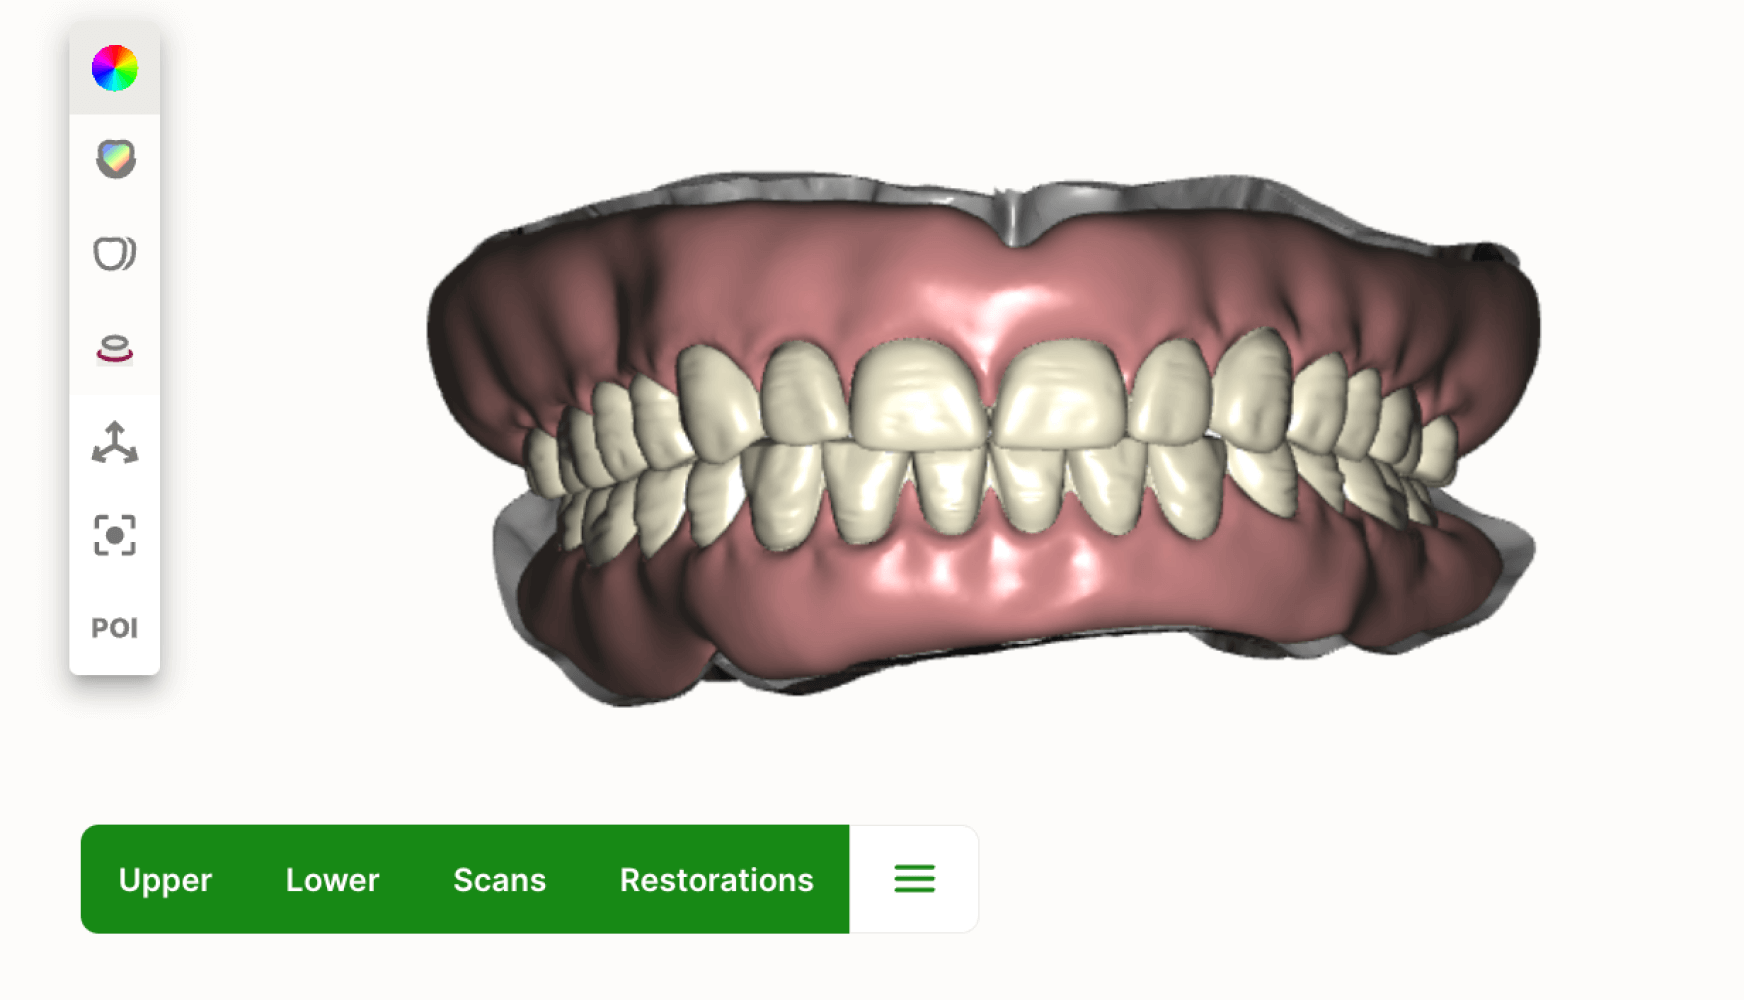
Intraoral scans were captured using a TRIOS 3Shape scanner to order the upper and lower immediate dentures from Dandy. Two bite registrations were taken: the patient’s VDO was initially measured at 47mm, but due to a collapsed bite with no posterior support, it was opened to 50mm for the second bite to restore the VDO. Shade selection was discussed with the patient, and she chose shade A1. The midline was verified, and intraoral and extraoral photos were taken, documenting the smile line, reposed position, bite, and side views. The patient was informed that her bite would be opened by 2-4 mm to accommodate the new prosthetic and restore function. Because of the patient’s naturally canted horizontal plane, the accuracy of the horizontal plane of the immediate dentures was a critical aspect of the design. I requested that the cuspal angles of the immediate dentures be kept to less than 30 degrees.
Fig. 3: Dandy’s design for the ordered upper and lower immediate dentures.
Appointment #3:
Extractions and alveoloplasty were performed and implants (sites #4, #7, #10, #12, #21, #23, #26, and #28) were placed and covered with healing abutments at the collaborating periodontist’s office. The patient was given immediate dentures following surgery.
Appointment #4:
The patient returned after wearing her immediate dentures and reported discomfort on the lower left flange and along the tongue and floor of her mouth. On examination, sores were found in these areas. The lower denture was adjusted and then lined with Bosworth soft liner. The patient was prescribed dexamethasone elixir to manage sore spots.
Appointment #5:
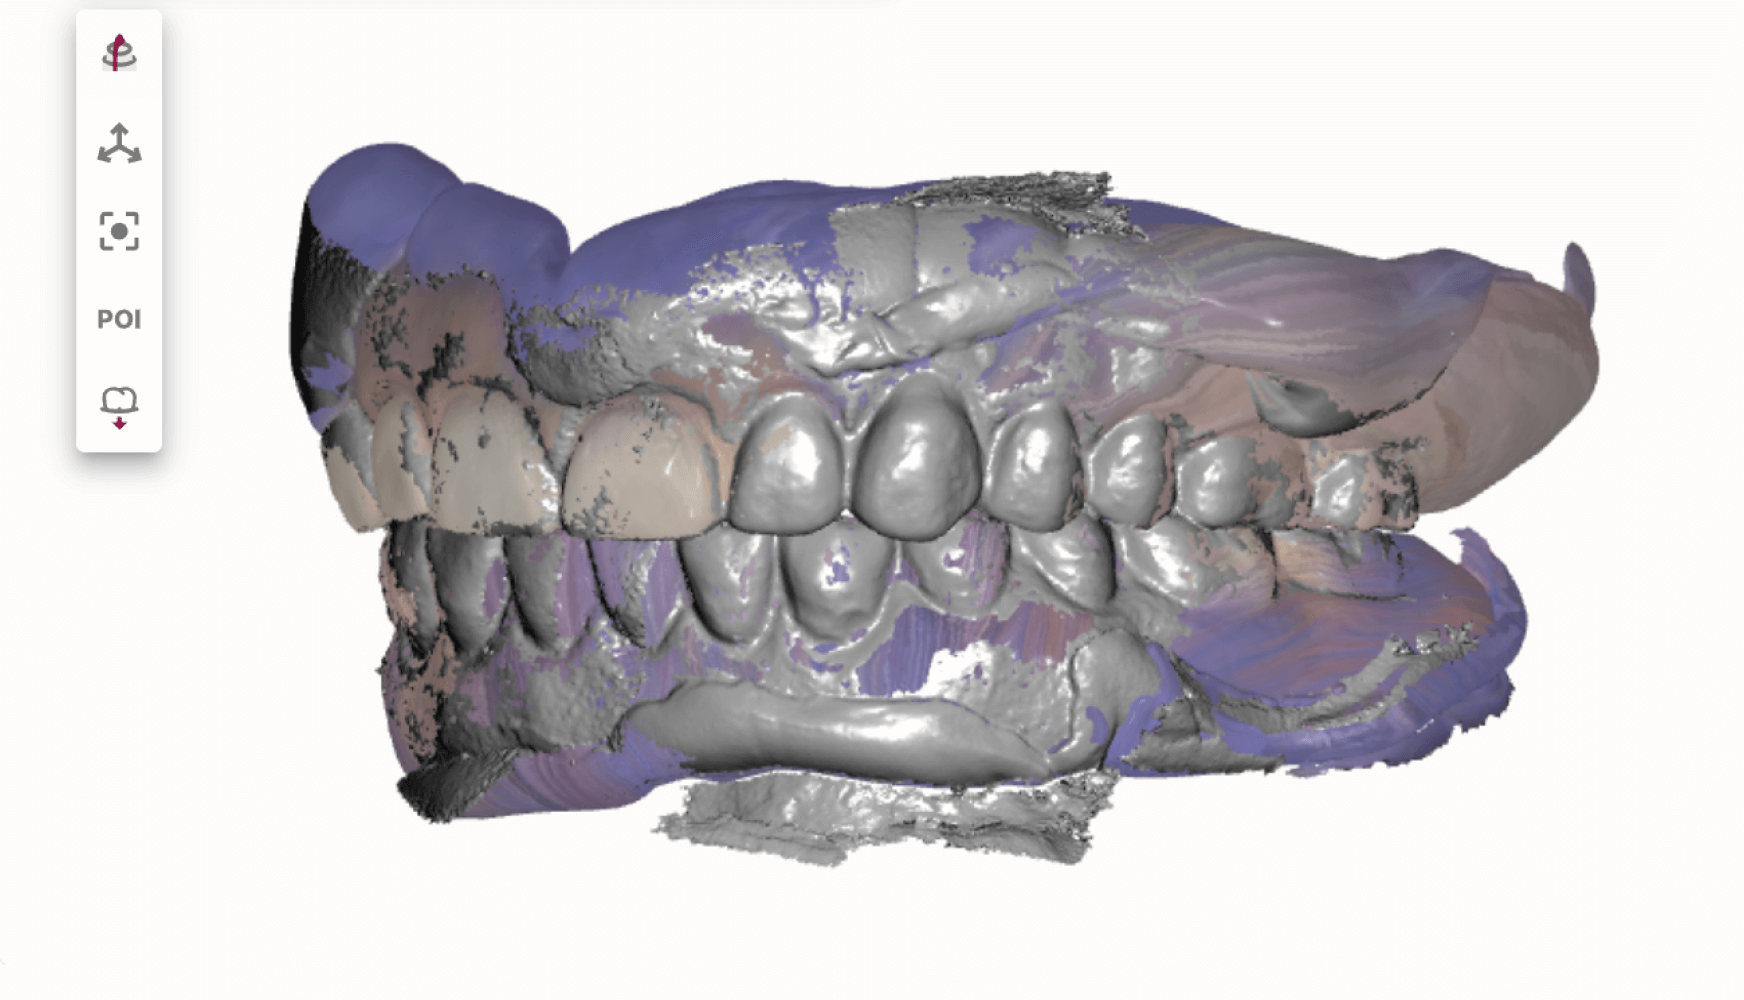
Following four months of healing, the patient returned to the office. The VDO, lip line, and smile line were confirmed to be both accurate and aligned to the patient’s needs. A light body impression was performed on the immediate dentures, and intraoral scans were captured for both arches. These scans were to be used for the design and fabrication of her final dentures that would eventually be implant-supported. I requested that Dandy keep the design of the final denture teeth, shade, and occlusion as close to the immediate dentures as possible. I also noted to Dandy that I would be placing these dentures onto implants with housings and to allow room for these housings.
Additionally, upon examination, a notable amount of soft tissue healed over the healing abutments of implant #12. The patient would receive tissue lasering at this site for accurate cuff measurements during her next appointment.
Fig. 4: The intraoral scans captured of the immediate denture with the light body impression. These scans are to be used for the fabrication of the patient’s final dentures, which will be converted into implant-supported dentures at completion of treatment.
Appointment #6:
At this appointment, the patient’s lip line, smile line, and VDO were all confirmed to be optimal. Healing abutments were removed, and the implant sites were thoroughly irrigated with Peridex. Soft tissue laser correction was performed at site #12 to expose the implant that had been covered by tissue. Cuff heights were recorded: #4 (2mm), #7 (3mm), #10 (3mm), #12 (3mm), and the rest ranging from 1-2 mm. Locators were ordered according to these measurements. The patient was highly satisfied with the fit and appearance of the try-in, allowing us to proceed with final processing.
Appointment #7:
The patient presented for the final seating of her upper and lower dentures, as well as the conversion steps for placing housings and locators. After a Peridex rinse, the healing abutments were removed, and each implant site was irrigated thoroughly with chlorhexidine.
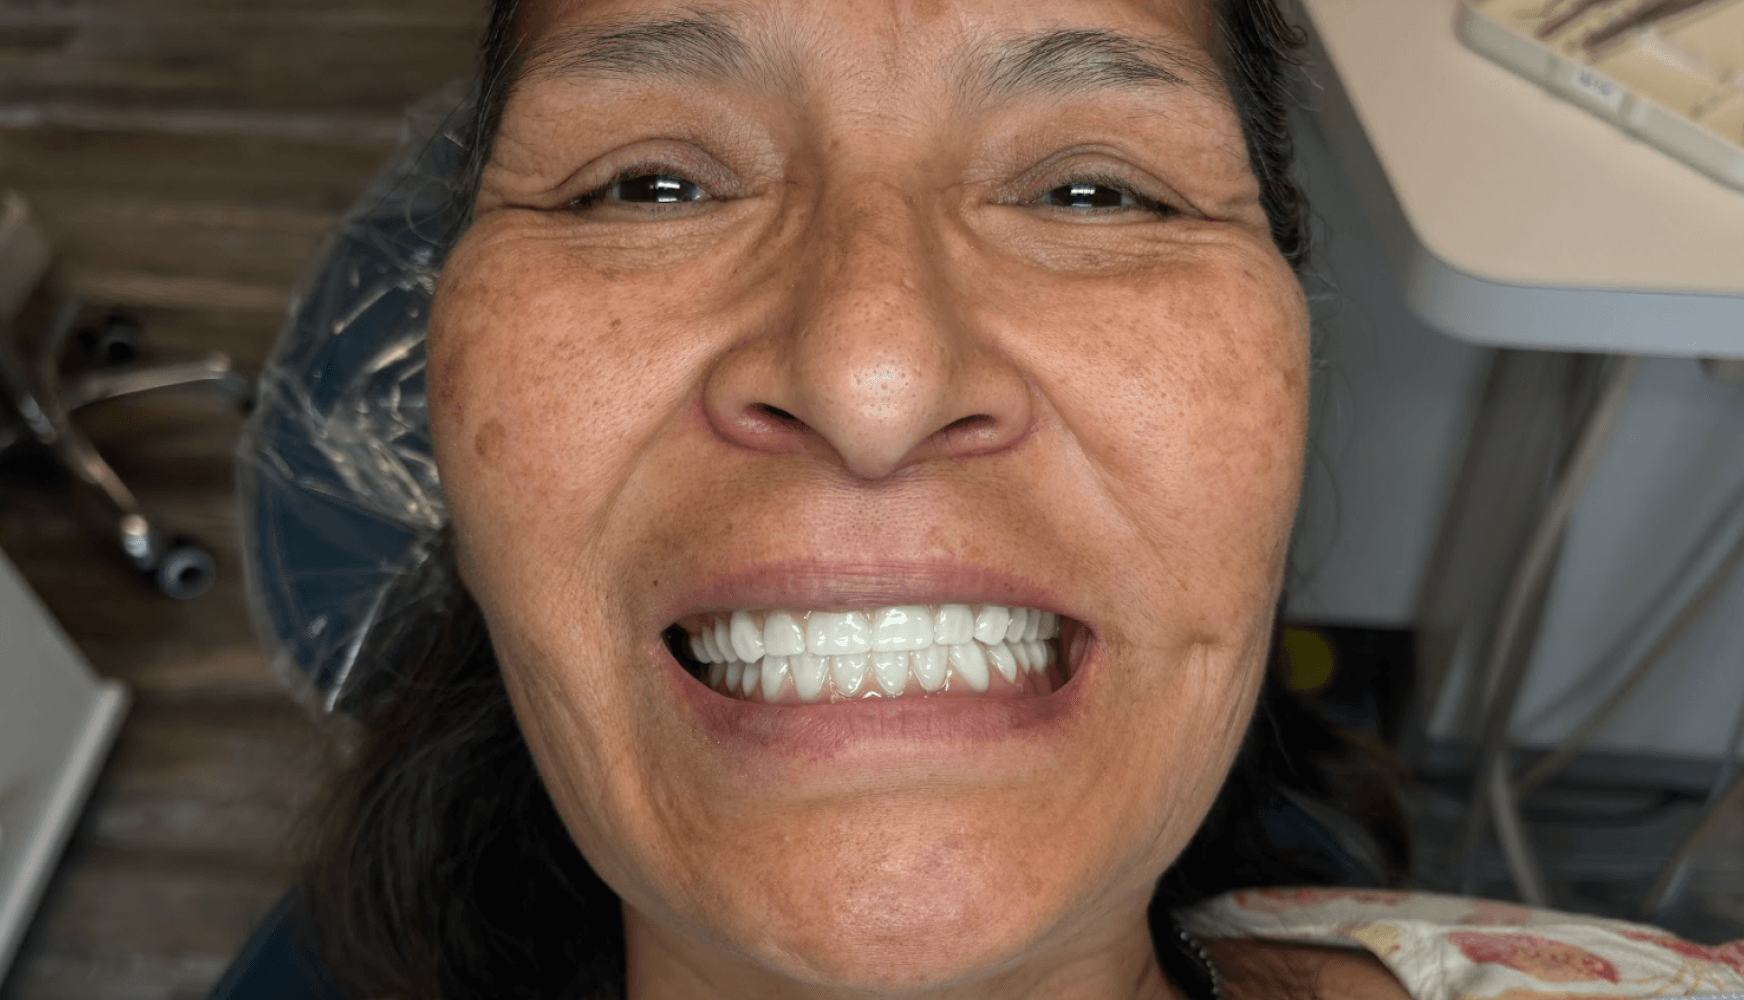
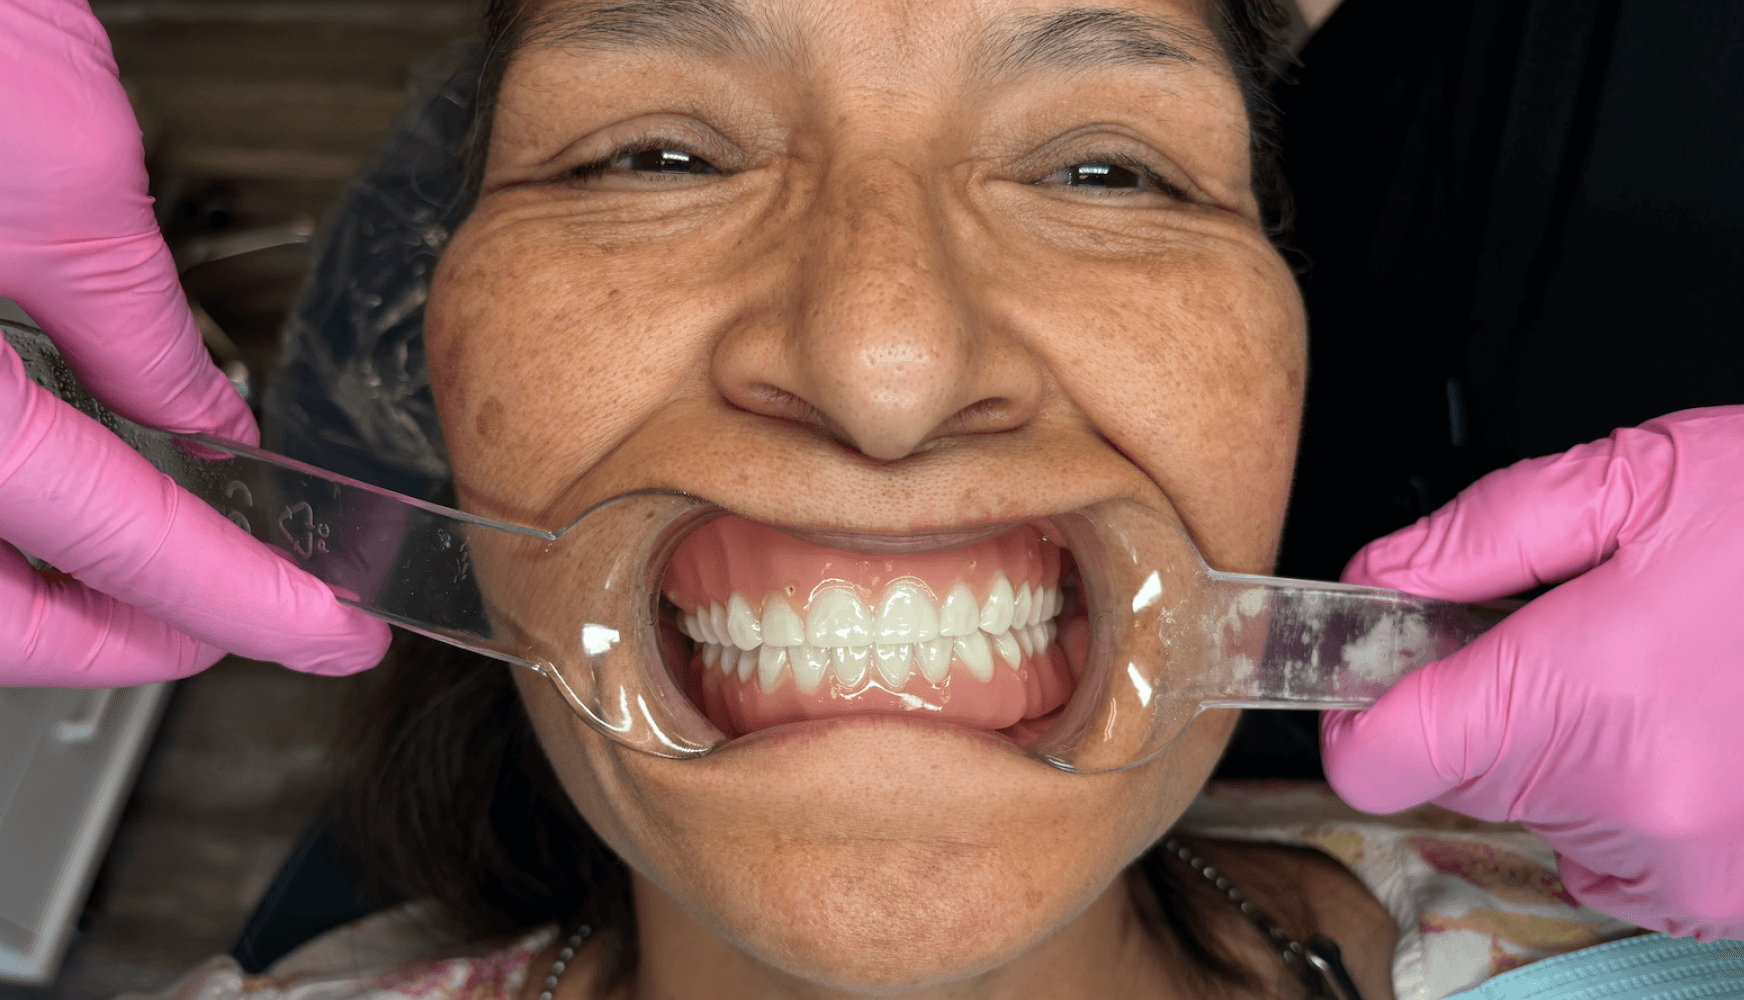
Locators were placed based on the previously recorded size and cuff height measurements. The housing inserts were placed into the dentures, which were then seated. The patient was very pleased with the final result, noting that the aesthetics, bite, VDO, lip line, and midline all looked excellent.
To secure the housings into the dentures, Zest Chairside pickup material was used, curing the housings chairside. Nylon sleeves (blue) were placed into the upper denture, while the lower denture was left with black sleeves to allow the patient time to practice inserting and removing the prosthesis. Site #4 was left without a sleeve, as there was a possibility the housing may need to be reset at the three-week checkup.
The implant angulation required divergence of 20° for most implants, with sites #7 and #10 requiring 40° divergence due to their angulation. We practiced the insertion and removal of the dentures with the patient until she felt comfortable performing the steps independently.
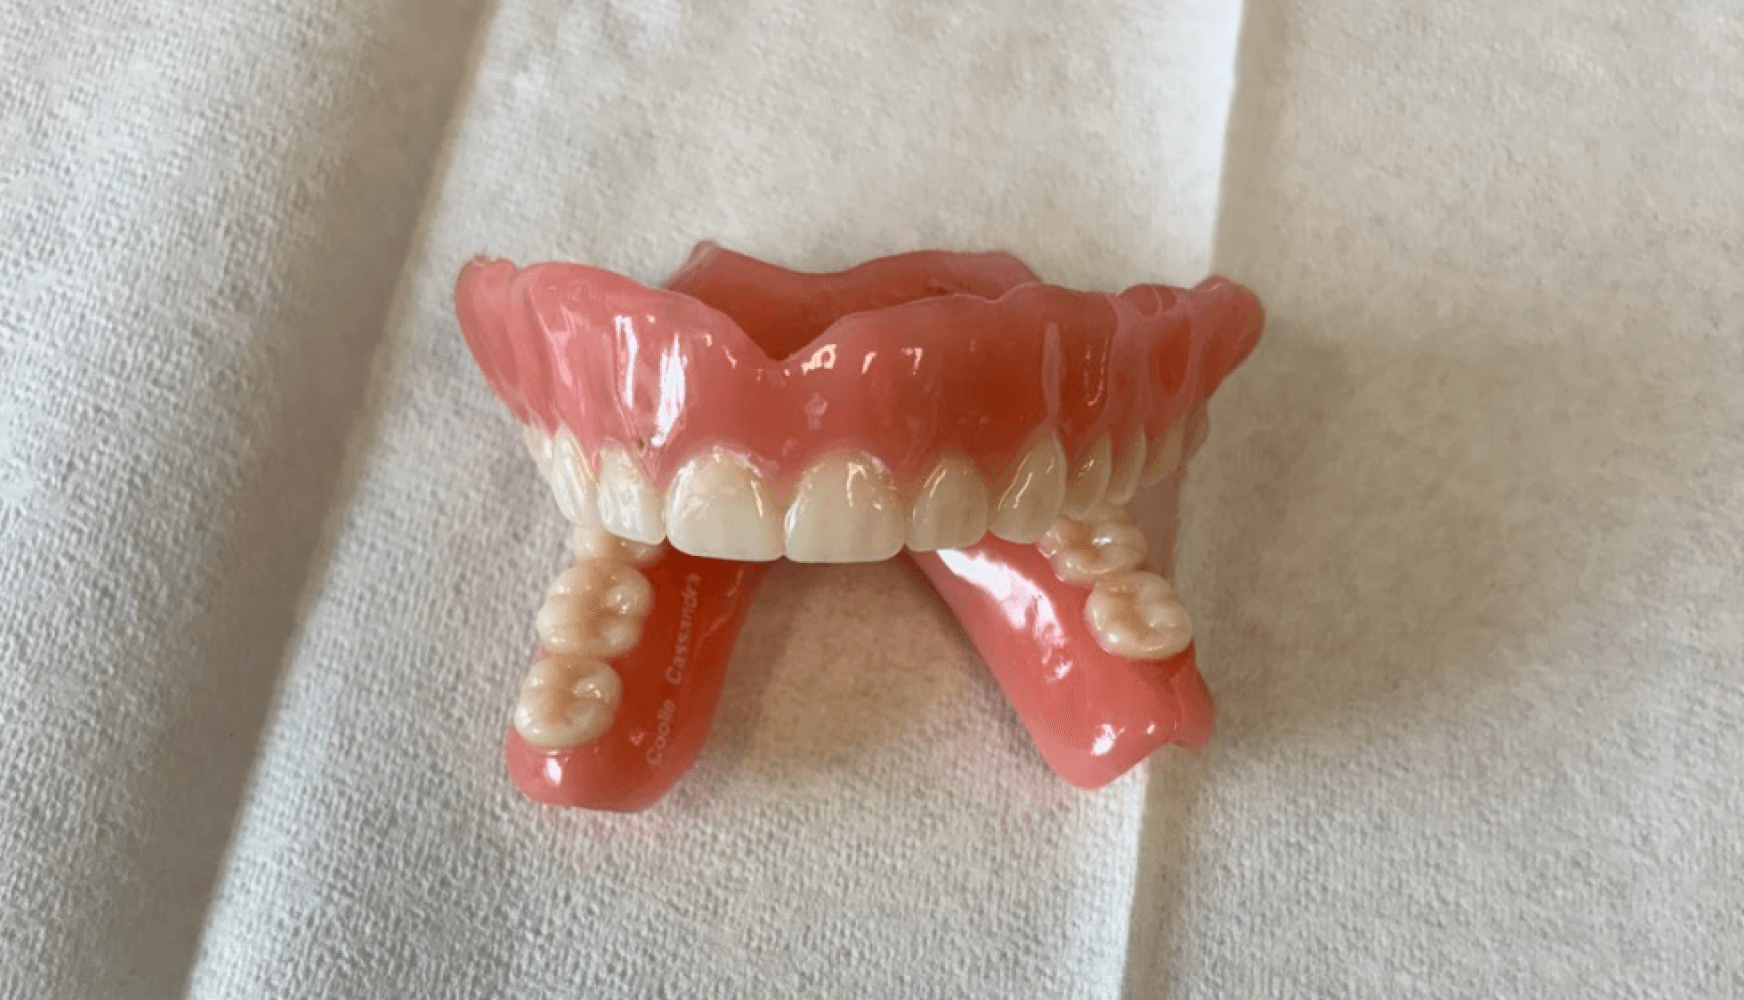
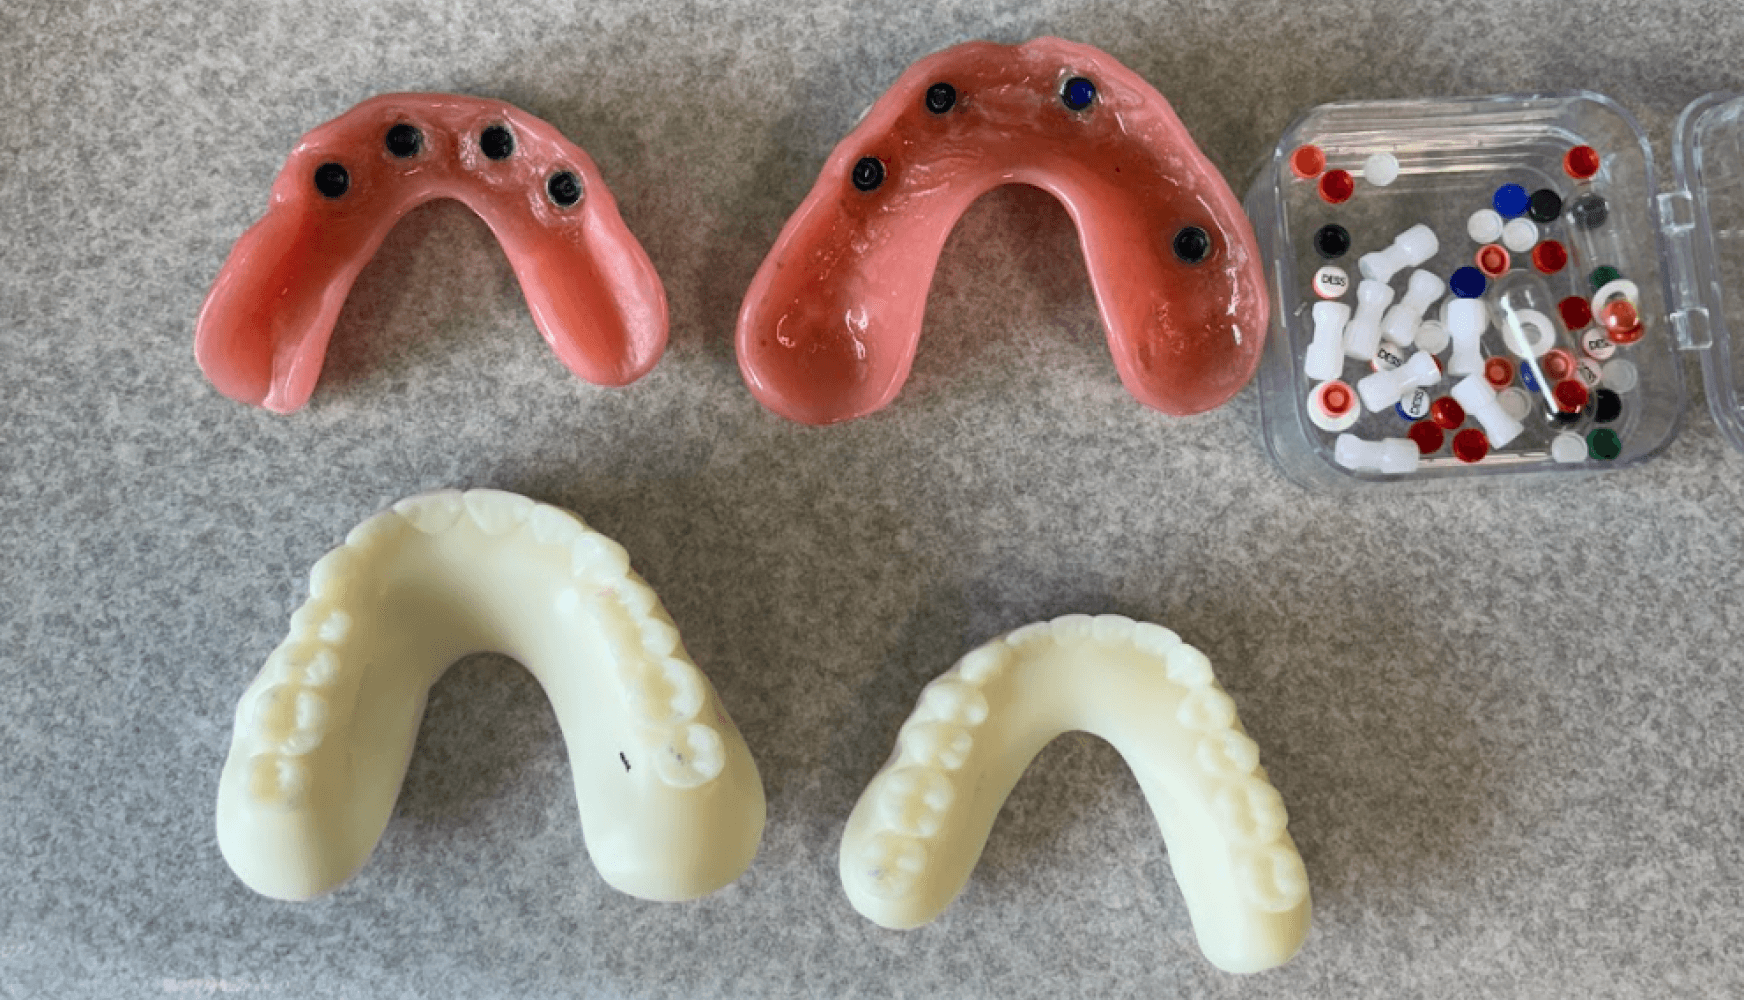
Fig. 5a, 5b: The final implant-supported dentures.
Appointment #8:
At the three-week follow-up appointment, the patient returned for a checkup on her dentures and locator attachments. She reported that the top denture fit firmly but was somewhat difficult to remove. Intraoral photos were taken to document the fit, and we reinforced oral hygiene instructions. The patient was scheduled for a three-month evaluation of her prosthesis.
Fig. 6a, 6b, 6c: Seated and delivered implant-supported dentures.
Appointment #9:
The patient presented for a three-month evaluation of her implant-supported dentures. New nylon inserts (pink) were placed in the lower denture at sites #20 and #29, and the patient found them tight, though still manageable. Minor adjustments were made to the upper denture, specifically in the vestibule near site #11, to alleviate soreness. After a slight adjustment and polishing, the patient reported a significant improvement in comfort. The locators were checked for tightness and cleaned with chlorhexidine. The patient was released without complications, and an annual cleaning and checkup were scheduled.
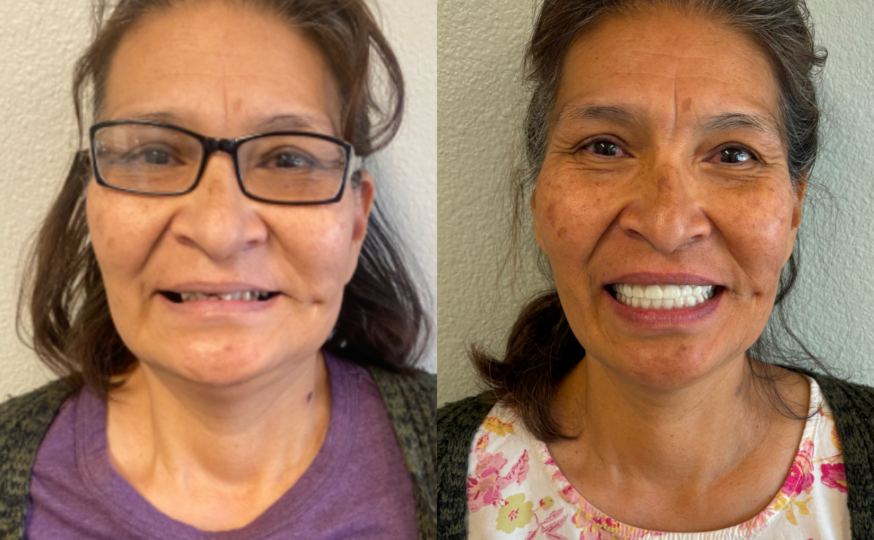
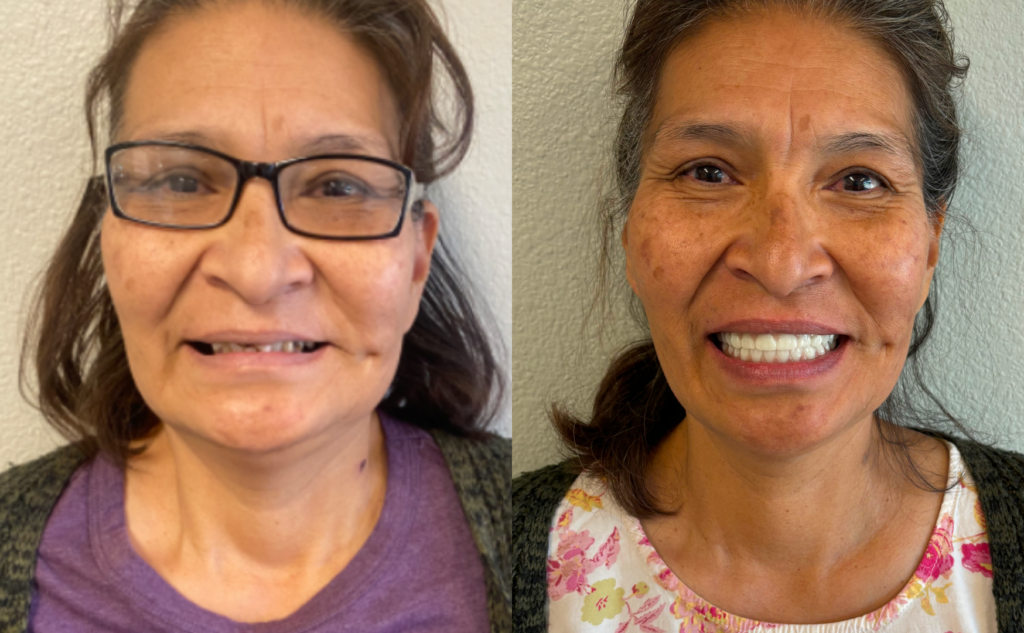
Patient Before and After
Dandy’s Technology
Dandy’s scanning and digital workflow were integral to the success of this case, providing precise measurements and facilitating efficient communication with the lab. The use of digital tools allowed for accurate fabrication of the immediate and implant-supported dentures, ensuring proper fit, locator placement, and patient satisfaction. Overall, the degree of communication and adherence to very specific design needs made this case successful.
Conclusion & Best Practices
This case demonstrates the successful transition from immediate dentures to implant-supported dentures with locator attachments, highlighting the importance of detailed planning and the use of digital technology. The combination of thorough anatomical assessment, precise VDO adjustments, and strategic locator placement resulted in a stable, comfortable prosthesis that met the patient’s functional and aesthetic goals. Although I followed a digital workflow, the fundamental principles of denture therapy remained the same. For cases requiring more nuance, I recommend connecting with Dandy and taking advantage of their readily available support team.
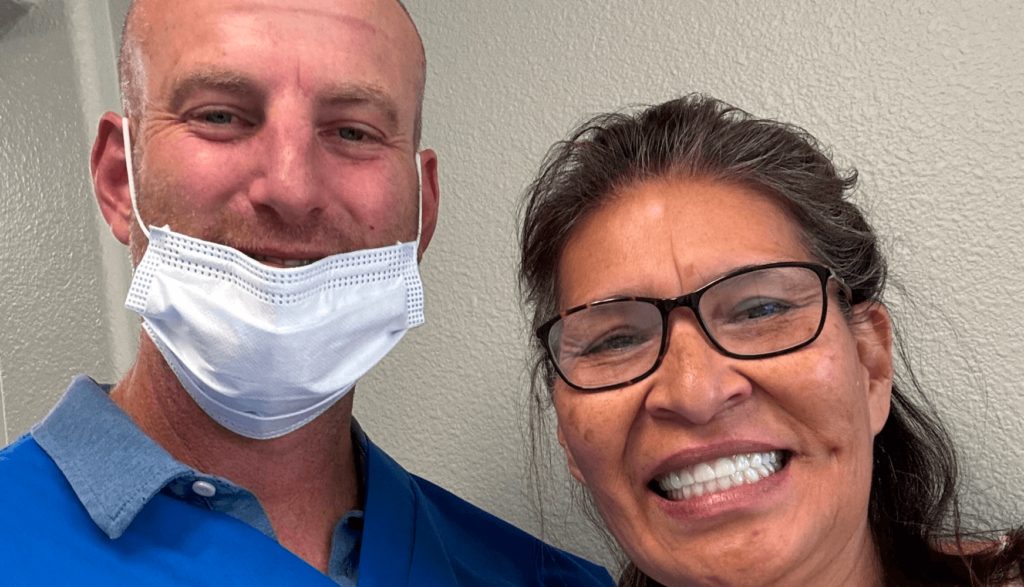
Fig. 7: Patient and Dr. Green after delivery of the final dentures.
About the Author
Dr. Green has been practicing dentistry since 2005. Born and raised in Nebraska, he earned his Bachelor of Science degree from Creighton University and continued his education at Creighton’s Dental School, where he received his Doctorate of Dental Surgery. After graduating, the mountains of Colorado drew him west, and he spent 13 years in private practice in the Fort Collins/Cheyenne, WY area. After taking a year off to travel the country with his family, Dr. Green and his wife, along with their four children, relocated to Durango, Colorado, where they are excited to make their home.
A member of the American Dental Association, Colorado Dental Association, and Academy of General Dentistry, Dr. Green actively pursues advanced dental education in numerous areas of dentistry. He has been recognized by the American Dental Association for his volunteer work through the Institute of Latin American Concern in the Dominican Republic
