How does one prepare for the perfect veneer? Like other dental treatments, veneer preparation requires precision and expertise. For every successful session, to achieve a beautiful, natural-looking smile without complications, you must consider what veneer types are suitable for the patient (including their personal needs and desires), what material is best, how to prepare the teeth prior to treatment, and the veneer prep design.
Whether you are placing one veneer or several to create the appearance of a wonderful symmetrical smile, your veneer prep can make or break this aesthetic procedure—literally and figuratively.
However, other considerations go into veneer prep design. We look at a few, including veneer types, why veneer prep is essential, the three types of veneers most clinicians use, and a step-by-step guide for getting teeth prepped for veneers. Also, you need a quality lab to partner with for the height of patient satisfaction.
For the most part, dental veneers are made of composite resin or porcelain. However, other materials are also available.
Choosing the right shade and veneer preparation
Natural teeth have a variance of colors: brown, grey, and yellow, all happening in transitions from top to bottom. When choosing the right shade, you have to consider the patient’s original teeth color so that the veneers blend perfectly because as time goes on, the undertone of the natural teeth might start showing through and might warm up with the veneer. Some factors that affect the shade are:
- The characteristics of the teeth.
- Skintone. Similar veneers may appear different due to the skin contrast of patients with various colors, including lip color.
- Other cosmetics like lip fillers and injections affect how the veneers appear in the mouth.
- The patient’s lifestyle. If your patient drinks tea, wine, coffee, smokes, or likes red sauces—pasta and pizza—they may need multiple colors of teeth that look right when blended together.
There are many ways to view aesthetics, so the desired shade should be one of the first decisions you make with your patient. It’s important you and they choose something a little more natural, so the treatment looks seamless and blends with the natural teeth. Clarify the amount of tooth reduction relative to the desired shade. You can also display before and after photographs of patients in the past, highlighting both the whole face and the face from the side to help them determine how many teeth will need to be restored to achieve their desired result.
Veneer preparation groupings
Dentistry groups veneers by the amount of reduction required. The three basic preparation groups of veneers include:
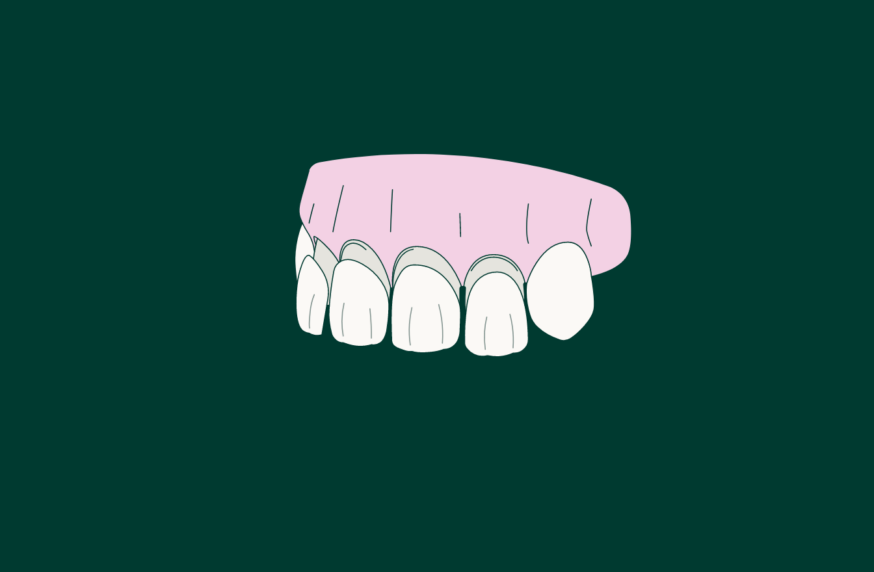
Minimal preparation veneers
As the name implies, this preparation design involves removing the least amount of tooth structure, in the .3 to .5mm range, and usually only enamel. These are sometimes referred to as no-prep veneers, which are much thinner than conventional veneers.
Classic preparation veneers
This preparation removes more tooth structure, usually .5mm or more to make room for a thicker veneer. Conventional thickness porcelain veneers employ this preparation.
More aggressive preparation veneers
In some cases, where there is trauma or the patient has a significant shade change goal, removing up to 1.5 mm might be required. These preparations can get past the enamel and into the dentin, which will require the appropriate adhesive later when placing veneers.
Selecting the best provisional material for veneer prep
When it comes to materials for dental veneers, one thing, amongst many others, is very important: the patient. Selecting the suitable material is directly tailored according to patient comfort, protection, and aesthetic needs.
Ideally, the provisional material should have excellent aesthetic properties, sufficient strength, and be easy to handle. Your go-to materials should be resistant to staining and blend with the natural teeth, allowing easy adaptation to the look and feel of future veneers.
Veneer preparation techniques for different cases
The approach to veneer preparation varies depending on the number of units the patient plans on restoring and the precise conditions of each case.
Whether it’s a single veneer to correct a minor flaw or multiple veneers for a full smile makeover, a number of techniques have been put forward for veneer preparation to ensure minimal interference, error-free final veneers, and patient satisfaction.
Cases of 1-2 units
Cases of 1-2 units typically require minimal enamel reduction to preserve the natural tooth structure. A direct composite provisionalis used because of its quick and easy-to-use properties. In cases of only one unit, you can trim and polish the provisional material in your hand before applying it to the prepared tooth. To apply, prepare the tooth, isolate the area, etch, and bond, using a flowable composite to bond the provisional. In cases of 2 units, bond, trim, and polish the provisionals while they are in the mouth. Finish cases with polishing to maintain the integrity of the patient’s smile.
Cases of 3-6 units
Cases of 3-6 units require a more comprehensive approach because multiple teeth are prepared to accommodate the veneers. Provisionals that can control gingival embrasures, allowing the gingiva to heal nicely around the provisional, are used. It is important to reline the provisional with acrylic before taking it out to trim or make any adjustments. Once it is ready, isolate or spot, etch, bond, and place the provisional with a flowable composite. BioTemps Provisionals are an excellent option in cases like this.
Cases of 6+ units
Cases of 6 or more units often require extensive preparation. It’s a very delicate process, just like other cases. However, this case includes significant enamel reduction across multiple teeth, so clearly communicate your intentions, needs, and what needs to be done when fabricating the final veneers to the lab to get your desired result. This gives the lab a clear and concise idea of what you want. You may send a photograph of the patient’s mouth, leaving detailed instructions. The goal is to achieve symmetrical and aesthetically pleasing results.
Veneer preparation by type
- Composite resin: Comprised of a methacrylate resin and an inorganic filler, like glass, resin veneers are the most affordable option.
- Porcelain: Porcelain veneers are mostly glass but without a clearly defined crystal structure and are stronger and more durable than composite resin.
- Lithium disilicate: Lithium disilicate veneers are ceramic that combine the metal lithium with silicon, giving it a translucency that matches surrounding dentition.
- Zirconia: Another ceramic material, zirconia (zirconia oxide) is opaquer than lithium disilicate, and is strong, stain resistant, and biocompatible.
Veneer preparation steps
Preparation design depends on many things, including the space needed, working thickness, the patient’s enamel volume, the enamel’s outside edge, and dentin exposure. Following is a simplified step-by-step overview of veneer prep.
Initial examination
The initial examination gathers information and establishes the desired result for the patient’s veneer case. Assess the patient’s oral health to ensure they can proceed with treatment. Also, consider the patient’s teeth position and the cosmetic issues to address.
Prepare teeth
After defining the goals, begin veneer preparation. Removing as little enamel as possible ensures a predictable bond, but some case goals require a preparation design that removes more enamel and gets into the dentin.
Resin preparation guides can transfer the established treatment goals and facilitate the tooth’s minimally invasive prep. Also, mark the areas for minimally invasive reduction with a pencil or waterproof marker. Then prepare the marked enamel with the appropriate reduction tools.
Some additional considerations:
- For classic preparation veneers, address interproximal spaces with a more aggressive reduction than the facial surface and include a clearly marked marginal line.
- If there is a horizontal finish line, decrease the reduction of the buccal enamel as you move from the incisal edge to the margin to allow the technician to mask the transition lines with the veneer.
- When placing additional veneers, design a prep with a feather edge to give the technician more leeway to meet the treatment goals with the veneer design.
Take impressions
Next, take digital impressions of the prepared teeth. Place a retraction cord (we suggest the double retraction cord technique) for veneers that have edges under the gumline, then remove it before taking the impression. Then, send the file to the lab for design, wax-up, and fabrication.
Place temporary veneers
If the veneer prep design requires a significant tooth reduction, protect against sensitivity with temporaries. Choose the appropriate size and shape and affix it with temporary cement. Be sure to educate the patient about how to care for the temporaries.
Place permanent veneers
Before placing final restorations, seat the veneer without cement and make any adjustments to perfect the fit and shape. Consider which cement might enhance the shade matching by trying to use the cement’s trial paste.
Once satisfied with the size, shape, and cement, clean and prepare the tooth surface for final cementation. Be sure to get confirmation the patient is satisfied, too.
Finally, initiate the process for your adhesive system and clean away any excess adhesive. Make any final adjustments by trimming and polishing. Then evaluate the patient’s bite to ensure that is in proper form after final veneer placement.
Tips for successful veneer preparation
- Patients’ needs come first. Discuss their expectations and color shade of choice. Digital shade-matching devices can be used here to ensure precise color matching.
- Create study models. The 3D printing for creating accurate models
- Use a minimally invasive approach and depth guides.
- Ensure proper margin placement and isolation techniques.
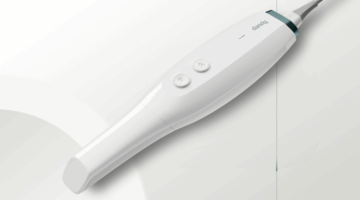
- Use high-quality impression materials. A high-resolution intraoral scanner should be your go-to for precise digital impressions.
- Provide very detailed instructions during laboratory communication. Virtual mock-ups could be created here, allowing both dentist and patient to visualize the final outcome.
- Practice and follow proper etching and bonding protocols when choosing the appropriate cement shade.
- Maintain comprehensive digital patient records for better case management and easy access to patient history and treatment plans.
- Stay updated with the latest techniques and materials. Take part in continuous training and updates on digital tools and software to stay up-to-date to better your practice.
Why is veneer preparation important?
Veneer preparation is essential for success with the treatment, for several reasons, including:
- It ensures that the teeth thickness isn’t increased after veneers are affixed.
- It facilitates a stronger bond, particularly when placed upon prepped enamel within two weeks of the preparation.
- It allows for decay removal or replacing composite fillings if necessary.
- It lets clinicians use a thicker veneer, which is especially important when masking discoloration.
- It permits planning of the veneer placement to hide the edges and prevent it from contacting other teeth.
- It presents the opportunity to shorten the incisal edge if the veneer prep design wraps the edge of the tooth.
How Dandy simplifies the veneer preparation process
Getting teeth prepped for veneers starts with an excellent veneer prep design. Veneer prep has to consider many factors to set up a veneer case for success. For a digital lab partner that can help you create ideal veneers please contact the team at Dandy with questions about veneer preparation or click here to learn about our many restorative services.
Sources
Dental Veneers: Benefits, Procedure, Costs, and Results (2023). Available at: https://www.healthline.com/health/dental-veneers#which-veneers-are-best (Accessed: 7 June 2023).
Lithium Disilicate: What Is It? | Colgate® (2023). Available at: https://www.colgate.com/en-us/oral-health/fillings/lithium-disilicate-what-is-it# (Accessed: 7 June 2023).
Zirconia Veneers & Lumineers – Prices, Advantages Dental Treatment Guide, Dental-treatment-guide.com. Available at: https://www.dental-treatment-guide.com/veneers/zirconia-veneers (Accessed: 7 June 2023).
The porcelain veneers procedure- A guide to the steps of the process. (2023). Available at: https://www.animated-teeth.com/porcelain_veneers/t3_porcelain_veneers_how.htm#ultra-thin.placement (Accessed: 9 June 2023).
Myth vs. Realities: Two Viewpoints on Prepared Veneers and Prep-Less Veneers (2023) Aacd.com. Available at: https://aacd.com/proxy.php?filename=files/Dental%20Professionals/jCD/Vol.%2027/Issue%202/27-2lesagewells.pdf (Accessed: 14 June 2023).
Veneers: What Are Dental Veneers? Cost, Procedure & Advantages (2023). Available at: https://my.clevelandclinic.org/health/treatments/23522-dental-veneers (Accessed: 14 June 2023).
How are Teeth Prepped for Veneers? (2023). Available at: https://www.newmouth.com/blog/teeth-prepped-for-veneers/ (Accessed: 6 June 2023).
Tooth preparation: current concepts for material selection (2021). Available at: https://pocketdentistry.com/tooth-preparation-current-concepts-for-material-selection/ (Accessed: 14 June 2023).