Up to the recent proliferation of digital dentistry, prescribing complete dentures meant going through a Byzantine process over the course of weeks–maybe even months. “Even just shipping was problematic,” says Chad Van Maele, a Dandy lab technician with more than a decade and a half of experience fabricating dental prostheses. “Doctors spend all that time working on that wax, marking the midline, adjusting VDO, taking that wash impression, and taking the bite… they slap it in the box and ship it to the lab, and if the truck that picks it up isn’t refrigerated and it’s August in Texas, then that wax up can melt… in winter, wax gets really brittle and if that box gets dropped, it can shatter like glass.”
The point is that your hard work as the practitioner is the foundation of any successful restoration, but the majority of the steps in complete denture cases are simply out of your hands. For this reason, Dandy wants to demystify the denture fabrication process, revealing each of the steps that transform your work into smiles.
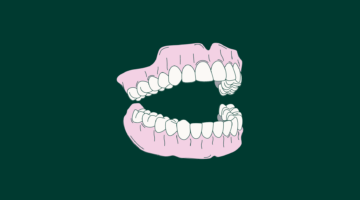
Types of dentures
Dandy’s digital complete dentures come in two primary types: milled and 3D printed.
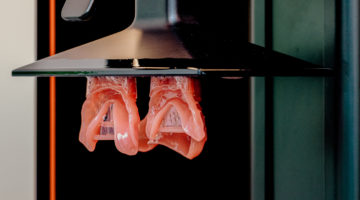
Dandy’s milled denture (also known as our Aesthetic Denture) is made from polymethyl methacrylate (PMMA), specifically, Ivoclar Ivobase Milled Base and Ivoclar DCL milled teeth, explains Van Maele. “It’s a great material; very high-end acrylic, tried and true.” Milling is what’s known as subtractive manufacturing; a five-axis mill carves and hones designs from a block of crude material. “[Dandy’s] milled denture material is the same as an analog denture,” Van Maele explains.
Milled dentures
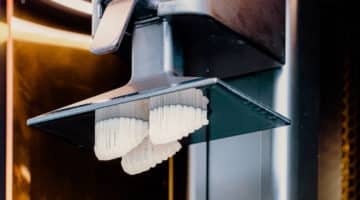
Dandy’s 3D printed denture (also known as our Signature Denture) is made from Dentsply Sirona Lucitone Digital IPN. “That material is just next level,” says Van Maele, explaining that, while Lucitone is comparable to the Aesthetic Denture material in most ways, “it can do things that these others can’t… [Lucitone] is a newer type of polymer resin that is a body-activated material, meaning that it doubles in strength while it’s in the patient’s mouth. Our milled dentures won’t do that.” 3D printing is known as additive manufacturing; the liquid resin is extruded, bonded, and cured layer upon layer until the final design is realized.
3D printed dentures
So what is the main qualitative difference between these two types of denture? In digital dentistry, if all of the steps in complete dentures are essentially the same, it comes down to strength and aesthetics. “Milled dentures, they have these little red fibers in the acrylic that emulate capillaries in the patient’s tissue… Our printed dentures do not have those fibers, so it’s just more of a plain pink.”
Analog (traditional) denture fabrication
Materials may have evolved from beeswax to PVS impression material, but the order of operations has remained more or less the same since the invention of dental trays themselves in the 1800s:
- Patient’s teeth are cleaned and prepped
- Impression material is mixed
- Impression material is loaded into a tray which is affixed to either the upper or lower teeth
- After setting, the tray is carefully released
- Repeat for the opposing set of teeth
- Dental stone is mixed and poured into molds, ensuring any voids or bubbles are eliminated
- After the stone cures, models are shipped to the lab
Taking these preliminary impressions lasts between 10-15 minutes–a gag-inducing, jaw-aching eternity for the patient. And unless you can physically deliver items to the lab yourself, you have no choice but to entrust your work to the many different sets of hands comprising each link in the logistical chain.
As you can see, even before a lab tech can begin crafting a piece, the analog process requires quite a few steps. In complete denture cases, only once the stone models have been packaged and shipped to the lab can the denture fabrication process begin in earnest. Note that the process is different for dentulous and edentulous patients, as well as for a patient with an existing prosthetic.
The following outlines all of the standard complete denture steps once the stone models arrive at the lab:
- Using stone models, a custom tray is fabricated
- The custom tray is shipped back to the dentist
- Using the custom tray, the dentist takes another impression of the patient’s oral cavity
- The custom tray is shipped back to the lab
- Using the custom tray, the lab fabricates a wax rim
- The wax rim is shipped back to the dentist
- The wax rim is fitted and bite registration is taken. Correct VDO, midline, lip support, and incisal edges are determined
- The adjusted wax rim and master impression materials are shipped back to the lab, along with photos for color reference and any other pertinent notes
- The wax rim is fitted onto an articulator
- Teeth are selected by the technician to best match the size, shape, and color of the patient’s natural dentition. If there are no photos and/or a lack of notation, the technician uses their best judgment
- More wax is added to reproduce the patient’s palatal/gingival tissue, then smoothed to create a more natural look
- The wax up is then shipped back to the dentist for a try-in
- The patient returns to test the wax try-in. Any minor adjustments are made chairside using warm water or a torch to melt the wax
- The dentist ships the adjusted wax try-in back to the lab
- A flask is prepared i.e. coated with a separating agent, often petroleum jelly
- Plaster is poured into the bottom half of the flask, the wax try-in is fitted into the plaster in order to lock the model in place and create a seal. Dental stone is then added, investing the entire surface of the model
- The incisal and occlusal tooth surfaces are minimally exposed and a separating medium is added to the stone surface in order to facilitate de-flasking. More stone is poured on top
- This same process takes place again with the opposing teeth
- Both halves are fitted into a flask clamp and the stone is allowed to set.
- The flasks are submerged in hot water in order to melt the wax
- The flasks are opened and any residual wax cleaned out using hot water. The teeth whose surfaces had been exposed are left in the stone
- Separating medium is applied to the stone surfaces, being sure not to get any on the tooth surfaces
- Acrylic is mixed
- Acrylic is packed into the stone mold still in the flasks, which are subjected to pressure from a hydraulic press, repeating this process numerous times until maximum density is achieved
- Flasks are returned to hot water for curing
- The acrylic prosthetic is de-flasked, destroying the master mold
- The prosthetic is re-articulated to check bite
- The prosthetic is cleaned, finished and polished
- The prosthetic is shipped back to the dentist
At this stage, the denture may be finally placed. If the patient and dentist are both happy with the fit, the process is complete. Denture steps up to this point have been labor intensive, so if the patient does not like the fit, the dentist must hope a wash impression and round of relining will address the issue. If not, the entire denture fabrication process must begin again.
A note on dental laboratories: The process described above does not account for every different permutation of the dental laboratory; some may have a single technician. Some may use heat injection as opposed to cold pour. Many work on a first-in-first-out basis. Often, larger labs will function like an assembly line, with each stage of fabrication performed by a different person. Regardless, expect the analog process from first impression to final placement to last anywhere from six weeks to three months.
Digital denture fabrication
With digital dentures, patients need only visit their dentist twice: once for an initial scan and once for a final fitting of the complete denture. Steps in between preclude all of the additional appointments and the back-and-forth of shipping.
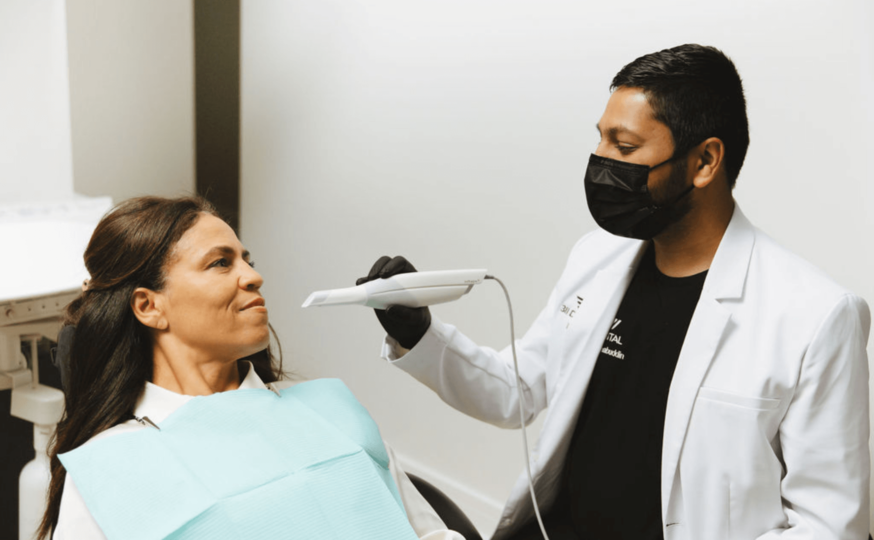
We’ll walk you through the digital denture process with Dandy. It begins when the patient’s oral cavity is mapped in minute detail using an intraoral scanner that emits painless pulses of light. This information is immediately translated into a 3D model, which not only maps tooth and gingival surfaces, but matches shades, and acts as bite registration. The entire process takes two-five minutes. From here, the dentist can digitally send the scan data, additional notes/info, and any reference photos to the lab where Dandy’s technicians step in. Complete denture fabrication begins the second you hit ‘send.’
- Once the lab receives the scan data, techs use software to check bite, shade, and shape. Dandy’s powerful design software makes it possible to rearrange dentition instantly, with all teeth automatically fitting to accommodate any adjustment.
- The tech loads the correct color resin/PMMA into the 3D printer/five-axis mill, respectively and initiates the process, which continues automatically until the denture is complete. This process takes approximately one hour and a half.
- The newly printed denture is liberated from the raft, inspected, and refined if necessary. This may take approximately 30 minutes.
- The finished prosthetic is then shipped to the dentist.
At this point, the patient can return to the dentist to fit their prosthetic. As the scanning technology underpinning the prosthetic is so advanced and the fabrication tools are so precise, the fit is highly unlikely to need any adjustments. If an adjustment is needed or a prosthetic must be remade, there’s no need to worry. “All that information is preserved digitally,” says Van Maele. “Even if your office were to burn down, we’ve still got [all of the patient’s data and scans] ready to go.” From the moment you hit “send” on that first scan to the final product, the process takes approximately one week. It’s that easy.
Complete dentures in 2 Appointments with Dandy
Even a cursory comparison of the traditional and digital denture fabrication processes reveals clear superiority. If your goal is to get your patients fitted with a complete denture, steps like articulating, shade-matching, and shipping are crucial to the traditional process. But if you partner with Dandy, these and many others in between are simplified if not entirely eliminated.
Still skeptical? You’re not alone. “I got chosen to be one of the pilot offices to go digital,” Van Maele explains of a previous job. At the point in question he already had years of analog fabrication under his belt. After going through the initial digital training, he returned to the practice where he’d been working. “There was skepticism [among the dental staff] right up until we did our first case,” he continues. “You know what my biggest problem with that case was? I did a try-in when I didn’t need to because it was perfect. [The patient] literally said ‘No changes. How soon can we have the final?… that was the moment the skepticism melted away.” Advanced scanning, incredible software, and state-of-the-art tech mean that you can increase the volume of cases your practice can handle, improve outcomes, and increase patient satisfaction overall. Reach out to Dandy today to unlock the efficiency of 2-Appointment Dentures.